Quarter 4
Week 37 (May 23rd - 27th)
Week 36 (May 16th - 20th)
Any student who may not have completed his/her 3rd and final SRI attempt should do so today. The class will need to be quiet, if this is the case.
Students will complete an end of year survey found at this link:
https://www.surveymonkey.com/r/VHB3N35
Complete this Brainteaser Quiz. Take your time. Think each question through. View the correct answers when done.
http://www.gotoquiz.com/the_brainteaser_quiz
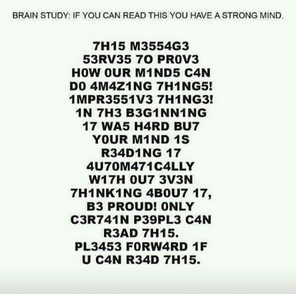
See if you can read this...
Students will complete an end of year survey found at this link:
https://www.surveymonkey.com/r/VHB3N35
Complete this Brainteaser Quiz. Take your time. Think each question through. View the correct answers when done.
http://www.gotoquiz.com/the_brainteaser_quiz
See if you can read this...
Week 32 (April 18th - 22nd)
Refer to the directions below to help you to know what you need to get images of for the project. There are also hardcopies of the handouts as well that are left on the long skinny table to the right, as you enter the classroom. Please make sure students return the handouts and keep them in good condition.
If done saving all 7 photos to one's flash drive, students should start/continue working with PhotoStory 3.
If done saving all 7 photos to one's flash drive, students should start/continue working with PhotoStory 3.
- Open the PhotoStory 3 desktop icon. It looks like a photograph with a person wearing a yellow shirt and a person wearing an aqua colored shirt.
- Select "Begin a New Story" and click "Next."
- Click "Import Pictures" and select all 7 photos for the Days of Creation Project, which should be able to be found on one's flash drive.
- Rearrange the photos into the order of the Days of Creation from Day 1 through Day 7.
- Use the class microphones to record what happens on each day of creation. The microphone should be plugged into the microphone jack, located next to the headphone jack. Hold the microphone at least 1-2 inches away from one’s mouth.
- Click "Save Project" and save the project as Last Name First Name Days of Creation Project onto their flash drive.
- Please make sure the microphones are put back in the storage container at the back of the classroom, if microphones are used today.
Week 31 (April 11th - April 15th)
Students will save as many of the required 7 images needed for the Days of Creation project as possible. There are 6 days of creation and 1 day of rest and there is an image needed for each day. Refer to the directions below to help you to know what you need to get images of for the project. There are also hardcopies of the handouts as well that are left on the long skinny table to the right, as you enter the classroom. Please make sure students return the handouts and keep them in good condition.
If done saving all 7 photos to one's flash drive, students should start working with PhotoStory 3.
If done saving all 7 photos to one's flash drive, students should start working with PhotoStory 3.
- Open the PhotoStory 3 desktop icon. It looks like a photograph with a person wearing a yellow shirt and a person wearing an aqua colored shirt.
- Select "Begin a New Story" and click "Next."
- Click "Import Pictures" and select all 7 photos for the Days of Creation Project, which should be able to be found on one's flash drive.
- Rearrange the photos into the order of the Days of Creation from Day 1 through Day 7.
- Click "Save Project" and save the project as Last Name First Name Days of Creation Project.
- Students will continue from this point next week. They can hold off on using microphones and creating music until next week.
| days_of_creation_digital_story_project_grade_3.doc |
Week 30 (April 4th - April 8th)
Students will listen to a story on the Days of Creation, as read by the teacher. Review with the students, what was created on each of the 6 days of creation and what happened on the 7th day.
Students should attempt to create a new folder on their flash drive, called "Days of Creation Project." If this is an issue, at the very least, students can skip this step and make sure that images are saved from online to their flash drive. See below.
Save as many of the required 7 images needed for the project as possible. There are 6 days of creation and 1 day of rest and there is an image needed for each day. Refer to the directions below to help you to know what you need to get images of for the project.
| days_of_creation_digital_story_project_grade_3.doc |
Week 29 (March 21st - March 25th)
No class this week. There is no school on our class day. Easter Vacation!
Week 28 (March 14th - March 18th)
A limerick is a silly poem with five lines. They are often funny or nonsensical. They have a very specific rhythm or beat. Limericks were made famous by Edward Lear, a famous author who wrote the "Book of Nonsense" in the 1800's. This was an entire book of silly limericks. They originate from Ireland which is why we often hear them around St. Patrick’s Day.
How to write a limerick:
The first, second and fifth lines rhyme with each other and have the same number of syllables (typically 8 or 9).
The third and fourth lines rhyme with each other and have the same number of syllables (typically 5 or 6)
Limericks often start with the line "There once was a..." or "There was a..."
View examples and learn more about limericks here:
http://www.kidzone.ws/poetry/limerick.htm
Your Assignment:
Type (1) limerick in Microsoft Word and copy and paste an Internet image beneath or to the side of the funny poem you create. The poem can be nonsensical and funny but must be school appropriate.
Quarter 3
Week 27 (March 7th - March 11th)
A limerick is a silly poem with five lines. They are often funny or nonsensical. They have a very specific rhythm or beat. Limericks were made famous by Edward Lear, a famous author who wrote the "Book of Nonsense" in the 1800's. This was an entire book of silly limericks. They originate from Ireland which is why we often hear them around St. Patrick’s Day.
How to write a limerick:
The first, second and fifth lines rhyme with each other and have the same number of syllables (typically 8 or 9).
The third and fourth lines rhyme with each other and have the same number of syllables (typically 5 or 6)
Limericks often start with the line "There once was a..." or "There was a..."
View examples and learn more about limericks here:
http://www.kidzone.ws/poetry/limerick.htm
Your Assignment:
Type (1) limerick in Microsoft Word and copy and paste an Internet image beneath or to the side of the funny poem you create. The poem can be nonsensical and funny but must be school appropriate.
How to write a limerick:
The first, second and fifth lines rhyme with each other and have the same number of syllables (typically 8 or 9).
The third and fourth lines rhyme with each other and have the same number of syllables (typically 5 or 6)
Limericks often start with the line "There once was a..." or "There was a..."
View examples and learn more about limericks here:
http://www.kidzone.ws/poetry/limerick.htm
Your Assignment:
Type (1) limerick in Microsoft Word and copy and paste an Internet image beneath or to the side of the funny poem you create. The poem can be nonsensical and funny but must be school appropriate.
Week 26 (February 29th - March 4th)
Finish the Living Through History Timeline assignment.
| living_through_history_timetoast_timeline_project_grade_3_2015-2016.doc |
Week 25 (February 22nd - February 26th)
Finish the Living Through History Timeline assignment.
| living_through_history_timetoast_timeline_project_grade_3_2015-2016.doc |
Week 24 (February 15th - February 19th)
Work on Living Through History Timeline assignment.
| living_through_history_timetoast_timeline_project_grade_3_2015-2016.doc |
SRI (Scholastic Reading Inventory)
- 2nd Attempt of SRI (Scholastic Reading Inventory) Assessment
- Take Reading Comprehension assessment.
- Print scores and Recommended Reading Lists.
Week 23 (February 8th - February 12th)
| living_through_history_timetoast_timeline_project_grade_3_2015-2016.doc |
Week 22 (February 1st - February 5th)
No class because students returned to home room after Mass to prepare for Grandparents Day class performances.
Week 21 (January 25th - January 29th)
UNIT #5: Reading & Generating Timelines
SRI (Scholastic Reading Inventory)
- Login to Quia and finish answering questions about MLK Jr. and his life by reading through a timeline of his life's events.
Timeline Link: http://mlk-kpp01.stanford.edu/index.php/resources/article/king_major_events_chronology_1929_1968/
SRI (Scholastic Reading Inventory)
- 2nd Attempt of SRI (Scholastic Reading Inventory) Assessment
- Take Reading Comprehension assessment.
- Print scores and Recommended Reading Lists.
Week 20 (January 18th - January 22nd)
UNIT #5: Reading & Generating Timelines
- Login to Quia and continue to answer questions about MLK Jr. and his life by reading through a timeline of his life's events.
Timeline Link: http://mlk-kpp01.stanford.edu/index.php/resources/article/king_major_events_chronology_1929_1968/
Week 19 (January 11th - January 15th)
UNIT #5: Reading & Generating Timelines
- Login to Quia and continue to answer questions about MLK Jr. and his life by reading through a timeline of his life's events.
Timeline Link: http://mlk-kpp01.stanford.edu/index.php/resources/article/king_major_events_chronology_1929_1968/
Quarter 2
Week 18 (January 4th - January 8th)
UNIT #5: Reading & Generating Timelines
- Students will complete a word search about Martin Luther King Day. There are 15 words to find. You have a 10 minute timer.
http://www.abcya.com/word_search_martin_luther_king_day.htm - Access Keyboard Climber 1 (Complete all 3 levels) if you finish the word search before the timer expires.
http://www.tvokids.com/games/keyboardclimber - Begin to answer questions about MLK Jr. and his life by reading through a timeline of his life's events.
Timeline Link: http://mlk-kpp01.stanford.edu/index.php/resources/article/king_major_events_chronology_1929_1968/
Week 17 (December 14th - December 18th)
UNIT #4: Microsoft Word Photo Editing & Inserting Tables
- Students receive a copy of the 3 Magi M&M Poem upon entering.
- Students will be given 4 M&Ms that are not to be eaten until told to do so.
- Review keyboard shortcuts (copy, paste, cut, undo)
- Insert a 2 x 4 table.
- Read through the 3 Magi M&M Poem.
- Type the words in the left most column that are emphasized in the poem. Change the font size of the words to size 72.
- Copy and paste the below image of the red M&M using the right click copy and paste method.
- Use "In Front of Text" text wrapping to wrap the text of the finger pointing.
- Use the CTRL + Copy and CTRL + Paste keyboard shortcuts to copy and paste the image of the finger pointing into each box in the right most column of the table that was inserted.
- Use the green circle rotate option to rotate the finger pointing image to match the words in the left most column.
- Save the file as Last Name First 3 Magi M&M Poem
| week_17_3_magi_m_m_poem_grade_3.doc |

Week 16 (December 7th - December 11th)
UNIT #4: Microsoft Word Photo Editing & Inserting Tables
- Review keyboard shortcuts (copy, paste, cut, undo)
- Insert a 2 x 4 table.
- Type the words Up, Down, Right, Left in the left most column. Change the font size of the words to size 72.
- Copy and paste the below image of the finger pointing using the right click copy and paste method.
- Use "In Front of Text" text wrapping to wrap the text of the finger pointing.
- Use the CTRL + Copy and CTRL + Paste keyboard shortcuts to copy and paste the image of the finger pointing into each box in the right most column of the table that was inserted.
- Use the green circle rotate option to rotate the finger pointing image to match the words in the left most column.
- Save the file as Last Name First Name Finger Pointing

Week 15 (November 30th - December 4th)
UNIT #4: Microsoft Word Photo Editing & Inserting Tables
- Review how to add clip art.
- Review how to copy and paste images from the Internet.
- Review how to re-size images in Microsoft Word.
- Discuss keyboard shortcuts (copy, paste, cut, undo)
- Discuss inserting a table and re-sizing images.
Week 14 (November 16th - November 20th)
UNIT #3: Paragraph Formatting
- Finish the Thanksgiving Feast Paragraph.
| week_12-14_thanksgiving_feast_paragraph_project_grade_3.doc |
Week 13 (November 9th - November 13th)
UNIT #3: Paragraph Formatting
- Work on the Thanksgiving Feast Paragraph.
| week_12-14_thanksgiving_feast_paragraph_project_grade_3.doc |
Week 12 (November 2nd - November 6th)
UNIT #3: Paragraph Formatting
- Discuss the key points involved in typing sentences and paragraphs.
- Save the Thanksgiving Feast Paragraph to one's flash drive and begin working on the assignment.
| week_12-14_thanksgiving_feast_paragraph_project_grade_3.doc |
| weeks_11-12_learning_to_type_sentences_-_key_points_grade_3.doc |
Week 11 (October 26th - October 30th)
UNIT #2: Shift Key Symbols
- Students take a Shift Key Symbols Quiz. A study guide was emailed home. Students will need to identify the names of the Shift Key Symbols and copy material for the projector screen that involves Shift Key Symbols.
- Discuss the key points involved in typing sentences and paragraphs.
| weeks_11-12_learning_to_type_sentences_-_key_points_grade_3.doc |
Week 10 (October 19th - October 23rd)
UNIT #2: Shift Key Symbols
- Review for Shift Key Symbols Quiz (Friday October 30th). A study guide will be emailed home. Students will need to identify the names of the Shift Key Symbols and copy material for the projector screen that involves Shift Key Symbols.
Quarter 1
Week 9 (October 12th - October 16th)
- No Class (Teacher Professional Day)
Week 8 (October 5th - October 9th)
UNIT #2: Shift Key Symbols
- Being and finish typing the Shift Key Symbols List, starting with 1-9 and 0 and the symbols that go with each number.
- Re-type the numbers 1-9 and 0 and the symbols that go with each number before the end of class, with the goal of typing the numbers and symbols faster than the first time they were typed.
Week 7 (September 28th - October 2nd)
UNIT #1: Capitalization
- Keyboard Climber 2 (Complete all 3 levels with a 15 minute timer.)
- http://www.tvokids.com/games/keyboardclimber2
- Review the 3rd Grade Capitalization List for a summative assessment today.
- Access the Magical Capitals activity:
http://www.sheppardsoftware.com/grammar/capitalization.htm - Take quiz on capitalization.
Week 6 (September 21st - September 25th)
UNIT #1: Capitalization
- Review the 3rd Grade Capitalization List for a summative assessment next class.
- Keyboard Climber 1 (Complete all 3 levels with a 15 minute timer.)
http://www.tvokids.com/games/keyboardclimber - Keyboard Climber 2 (Complete all 3 levels with a 15 minute timer.)
http://www.tvokids.com/games/keyboardclimber2
Week 5 (September 14th - September 18th)
UNIT #1: Capitalization
- Mr. Kent is at a conference at the Bethany Center.
- Senora Jordan is the substitute.
- Type letters A to Z in uppercase and lowercase form. Practice changing font size, font color, and font style.
- Access the following sites:
Week 4 (September 7th - September 11th)
UNIT #1: Capitalization
- Remind students of the two ways (Shift and Caps Lock) that a letter can be capitalized.
- Students add to and finish their 3rd Grade Capitalization List.
- Access the Magical Capitals activity:
http://www.sheppardsoftware.com/grammar/capitalization.htm
Week 3 (August 31st - September 4th)
- Collect Flash Drives (Due 9/1/15 for full credit.)
- Organize flash drives with stickers and yarn.
- Create a 3rd grade technology folder on each student flash drive, labeled as First Name Last Name 3rd Grade Technology.
UNIT #1: Capitalization
- Work in pairs to discuss types of words you should capitalize.
- Make a class list of words you should capitalize based off of class suggestions.
- Discuss the two ways (Shift and Caps Lock) that a letter can be capitalized.
- Students open a blank Word document and type the title: 3rd Grade Capitalization List.
- Begin to type a list of 14 types of words that should be capitalized.
Week 2 (August 24th - 28th)
SRI (Scholastic Reading Inventory)
- 1st Attempt of SRI (Scholastic Reading Inventory) Assessment
- Email scores and Recommended Reading Lists to home room teacher.
Week 1 (August 17th - 21st)
Welcome Back!
- Discuss class rules, guidelines for success, procedures, consequences, and rewards.
- Teacher Qualities Answer Garden: http://answergarden.ch/view/186032
- Access any of the following suggested sites.
- http://www.abcya.com
- http://www.starfall.com
- http://www.funbrain.com
- http://www.tvokids.com
- http://www.disney.com
